![]()
![]()
The song: Without You
1. NO I CAN'T FORGET THIS EVENING
2. AND YOUR FACE WHEN YOU WERE LEAVING
3. BUT I GUESS THAT JUST THE WAY
4. THE STORY GOES
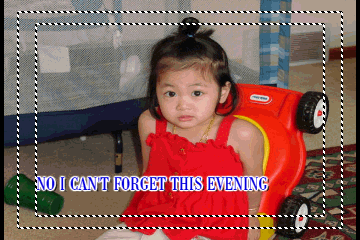
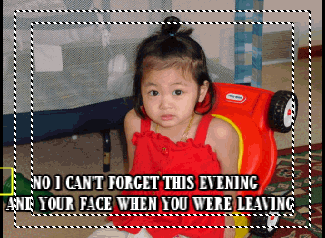
Note: The text should be within the Safe Title zone dotted line as shown in the picture.
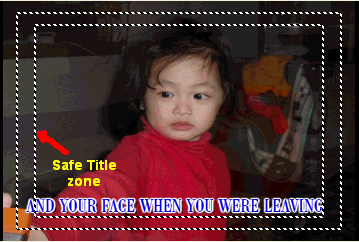
1. First will set the time markers for all the words in a
song. Click ![]() or press Home on the keyboard to move the location bar to
00:00:00:00
or press Home on the keyboard to move the location bar to
00:00:00:00
Click ![]() to
play your music video project. Each time you hear the vocal for each word,
press M to set the marker.
to
play your music video project. Each time you hear the vocal for each word,
press M to set the marker.

2. Now we need to label each marker by typing the song's
lyrics to them. Move the mouse's cursor to the first marker. When it turns
to ![]() ,
right-click and select Rename.
,
right-click and select Rename.
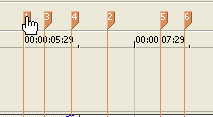

3. Type in the first word "NO" of the 1st line

Do the same for the rest of the words

4. To see all the words, click
![]() to zoom in.
to zoom in.


5. Now we are ready for adding lyrics on the screen. First we need to add 4 video tracks to the Timeline. 2 video tracks for the top line, and 2 video tracks for the bottom line. Click Insert/Video Track to add video track.
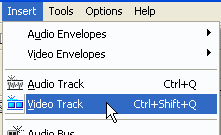
Do the same for the last three video tracks.
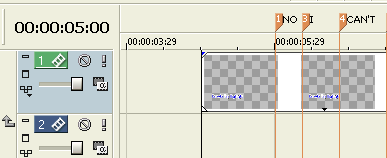
6. Move the location bar to 00:00:05:00 by clicking as shown below. Use Left and Right arrow to move 1 frame at a time.
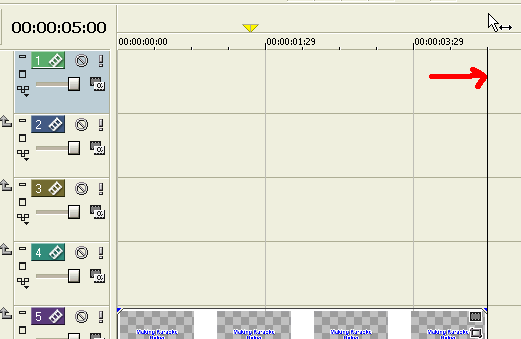
If you don't see all the tracks as above, then move the cursor pointer to the
border line as shown until the cursor point turns to
![]() . Hold
and drag to change the size of current window.
. Hold
and drag to change the size of current window.

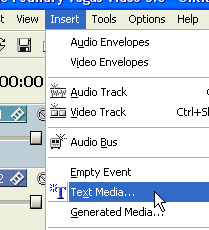
7. Click Insert, then Text Media...
The Text Media event is added to Track 1 starting at cursor 00:00:05:00
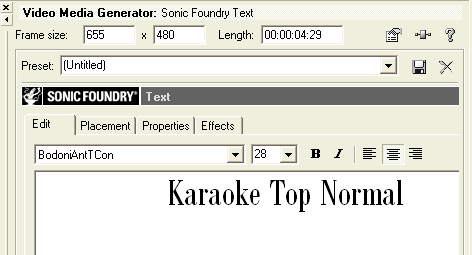
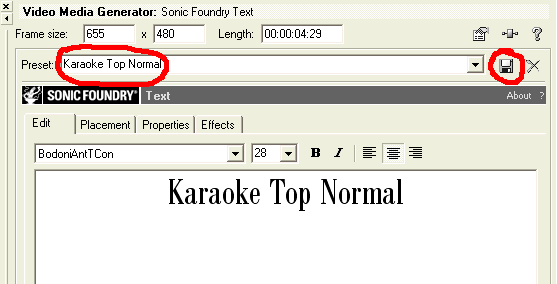
8. We will create a Preset for the top line in normal mode. Change your setting to setting below. Type Karaoke Top Normal, then press ENTER key
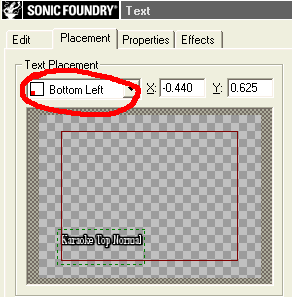
9. Click Placement Tab, then select Bottom Left.
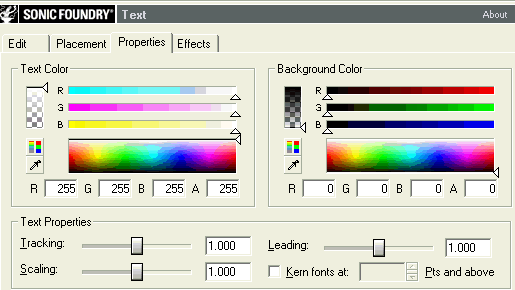
10. On the Properties window, change your setting as below. Text Color: white
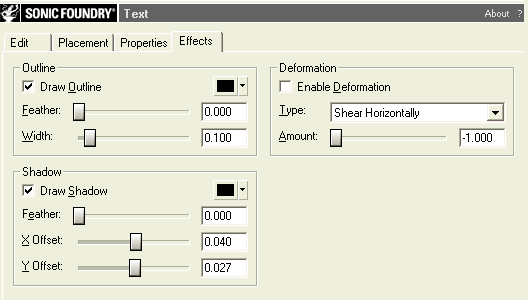
11. On the Effects window, change your setting as below. Outline color: Black
12. Type Karaoke Top Normal for the name. Click
![]() to save the
Preset.
to save the
Preset.
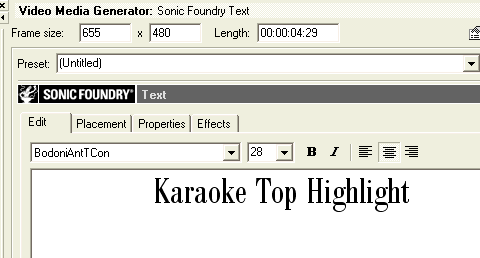
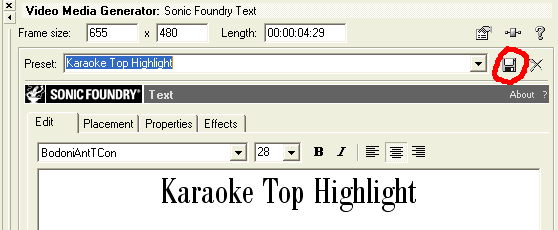
13. Now we will create the highlighted version of the top line. Type Karaoke Top Highlight in the text box, then press ENTER key. Change your setting to below.
14. Click Placement Tab, then select Bottom Left.

15. On the Properties window, change your setting to below. Text Color: Blue
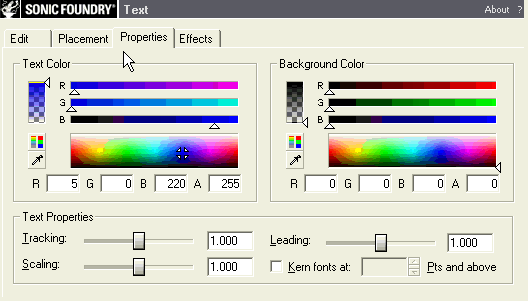
16. On the Effects window, change your setting to below. Outline color: White
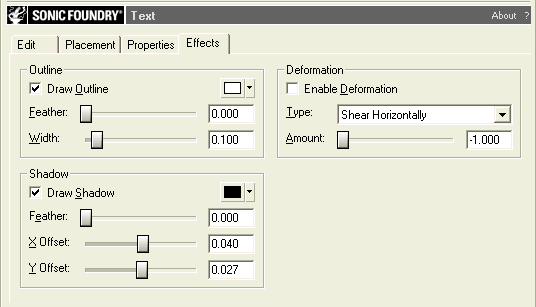
17. Type Karaoke Top Highlight for
the name, then click
![]() to save the
preset.
to save the
preset.
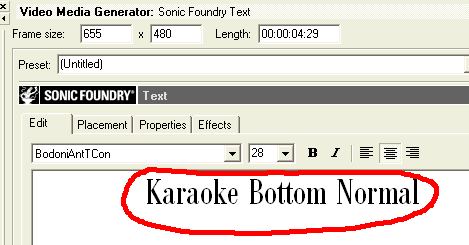
18. Now we will create the preset for the normal version of the bottom line. Change your setting to below. Type Karaoke Bottom Normal in the text box.
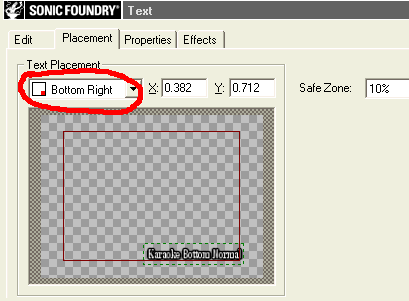
19. On the Placement window, change your setting to below.
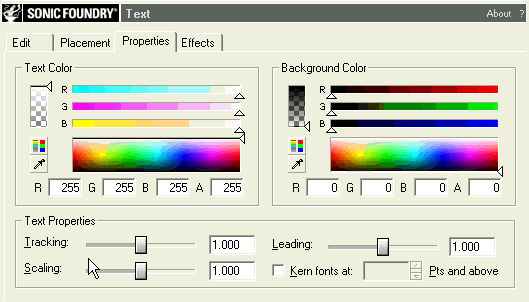
20. On Properties, change your setting to below. Text color: White
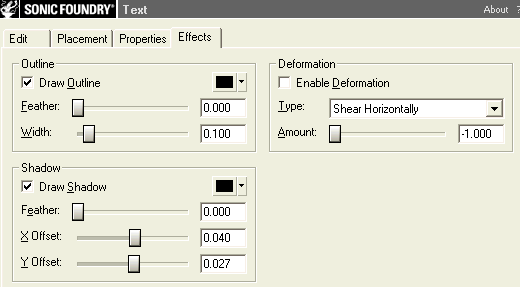
21. On the Effects window, change your setting to below. Outline color: Black
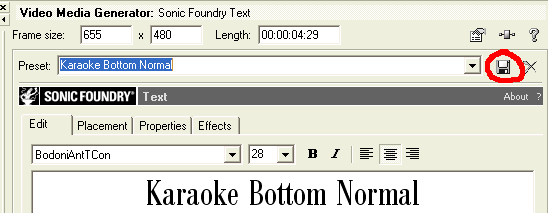
22. Type Karaoke Bottom Normal for
the name, then click
![]()
23. Now we will create the highlighted version of it. Type Karaoke Bottom Highlight in the text box.
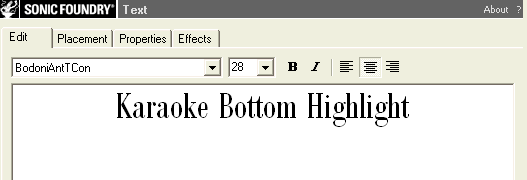
24. On the Placement window, change your setting to below.

25. On the Properties window, change your setting to below. Text color: Blue

26. On the Effects window, change your setting to below. Outline color: White

27. Type Karaoke Bottom Highlight for
the name, then click
![]() to save the
preset.
to save the
preset.
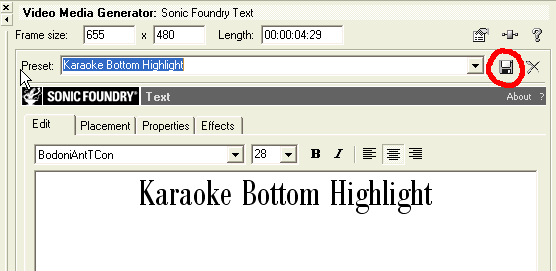
9. Now we are ready to type in the first line of lyrics. Select Karaoke Top Highlight from Preset.
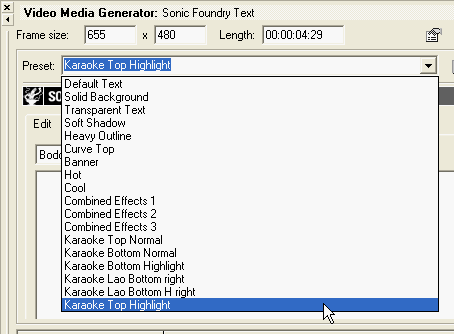
10. Select the text as shown in the picture by clicking in front of the first character, hold and drag to the right to highlight all the characters.

11. Type in the 1st line of lyric as: NO I CAN'T FORGET THIS EVENING. Then press Enter Key
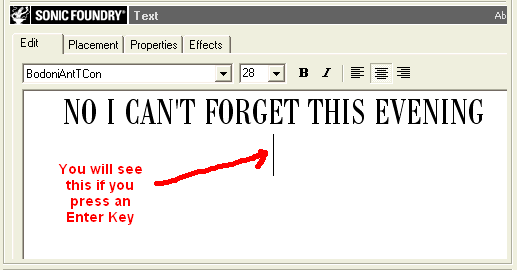
The lyrics will display on the View Monitor in real time.
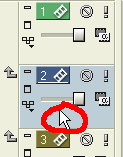
12. We will now add the normal version of the 1st line. Select Video Track 2 by clicking on it.
13. Click Insert, then Text Media...

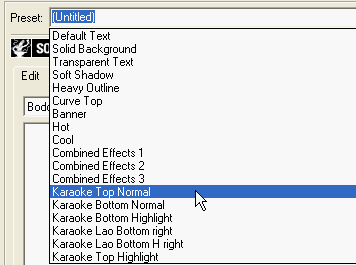
14. Select Karaoke Top Normal
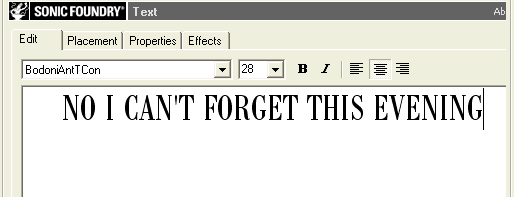
15. Type in the 1st line of lyric as: NO I CAN'T FORGET THIS EVENING.
On the View Monitor shows, the normal version of the 1st line is below the highlighted version.

Press Enter key will bring up it up. All you see now is only the highlighted version.
Note: Always press ENTER key for the Top line.

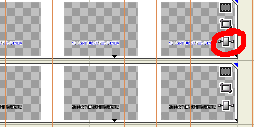
16. Now we will create a karaoke effect presets for the Top and
Bottom line. Click
![]() (Event
FX).
(Event
FX).
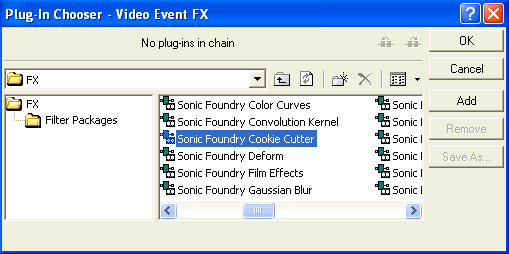
17. Select Sonic Foundry Cookie
Cutter, then click
![]()
18. Move the cursor to the start point of the 1st event at 00:00:05:00. Make your setting the same as below. Select yellow color.
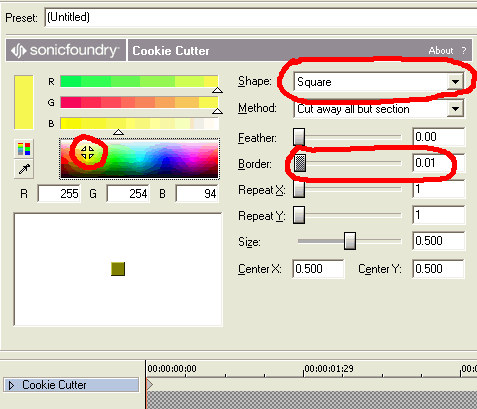
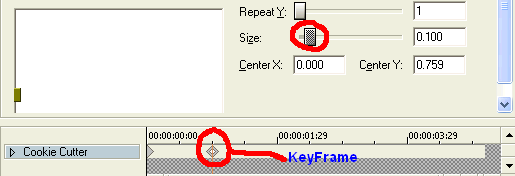
19. Move the Size slider to 0.300

You will see the yellow square outline on the Preview Monitor window
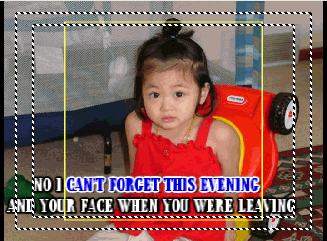
20. Move the square box and the size slider until the yellow square outline in front of the top line. The setting should be the same as in the Preview Monitor window. Center Y should be around 0.759.

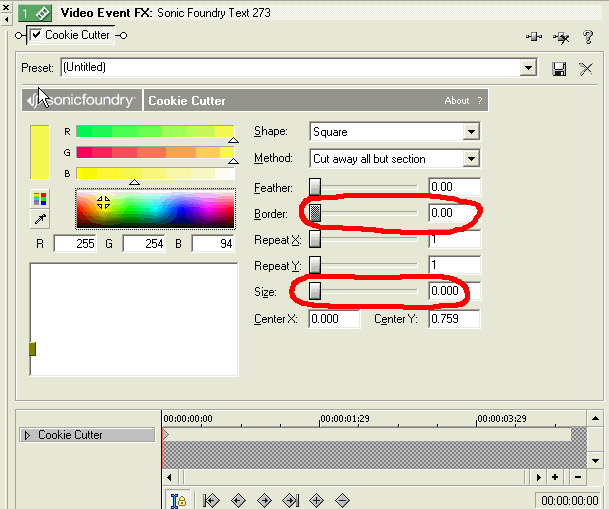
21. Set Border and Size to 0.00.
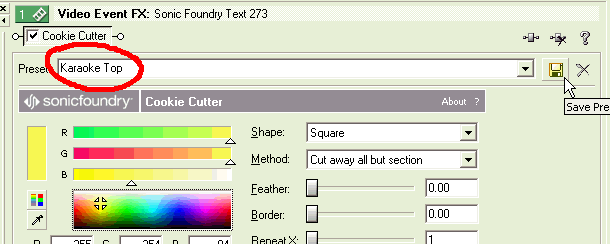
22. Type in Karaoke Top for the name.
Click ![]() to
save the preset. We will use this preset again and again.
to
save the preset. We will use this preset again and again.
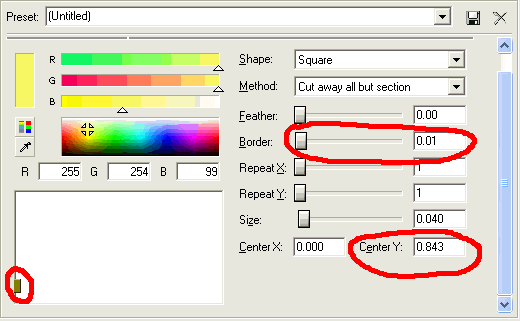
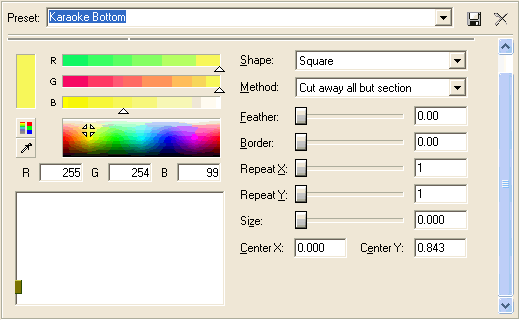
23. We will now create a preset for the bottom line. Change your setting to the setting below. Border: 0.01, Move the yellow square down until the yellow square outline in front of the bottom line. Center Y should be around 0.843.

24. Set Border = 0.00, and Size = 0.000. Type in Karaoke Bottom
for the preset name. Click
![]() to save this
preset.
to save this
preset.
25. Now we are ready to make the highlighted effect for the 1st line. Make sure the Video Event FX window is still open.
Move the cursor to the start point of the 1st line's event at 00:00:05:00
To go the start point of the Event, you have 2 options:
1. Hold Ctrl + Alt and click the Left arrow key to go to the end of the 1st line Event. (The Event have to be selected first by clicking on the Event)
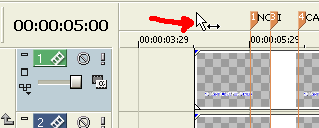
2. Move the cursor pointer to the start point of the 1st line's event, then click on it as show below. Use the Left and Right arrow key to move one frame at a time.
26. Click
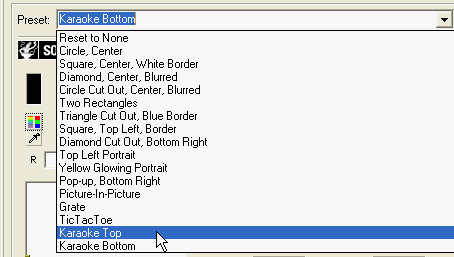
![]() to
select Karaoke Top from preset.
to
select Karaoke Top from preset.
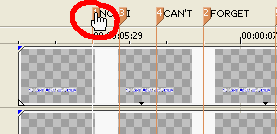
27. Move the cursor pointer to the first word "NO".
When it turns to ![]() ,
click on it to make the cursor snaps to it
,
click on it to make the cursor snaps to it
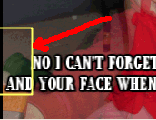
28. Set the Border = 0.01 to show the yellow square outline.

Move the Size slider to the right until the right edge of the yellow bar in front of the word "NO" on the Preview Monitor. The keyframe is added automatically.
Set Border = 0.00 to hide the yellow square outline.
29. Move the cursor pointer to the first word "I".
When it turns to ![]() ,
click on it to make the cursor snaps to it
,
click on it to make the cursor snaps to it

30. Set Border = 0.001, then move the Size's slider to the right until the yellow bar in front of the word "I"

Set Border = 0.00 to hide the yellow square outline.
30.1. Do the same for the rest of the words of the 1st line. The result should be similar to below.


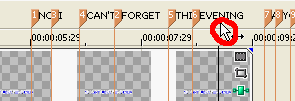
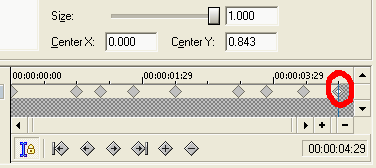
30.2. To highlight the last word "EVENING",
we need to add one more marker. Click
![]() , listen and
note the location of the end of the word "EVENING". Move cursor to
that location and click to set the location bar. Press M
to add a marker, and press Enter key.
, listen and
note the location of the end of the word "EVENING". Move cursor to
that location and click to set the location bar. Press M
to add a marker, and press Enter key.
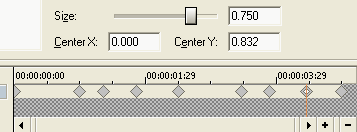
30.3. Move the Size slider to the right until the word "EVENING" highlighted.
![]()
30.4. Click
![]() to go to
the last keyframe (If there is not the last keyframe, then click on it). Move the Size slider to the right all the way.
to go to
the last keyframe (If there is not the last keyframe, then click on it). Move the Size slider to the right all the way.
The end of Crete Lyrics Part I